
Crocheters, welcome to your new favorite scrappy blanket: the Tunisian Crochet Lake Pepin Blanket! Whether you’re a pro with Tunisian crochet, you have played around with it, or you’ve never done it before, this pattern is super simple and easy to learn. Read on to learn about the design inspiration and all materials needed to create this crochet blanket.
Copyright Disclosure
This pattern is for your own personal use. No unauthorized reproduction, in whole or in part (i.e. copying and pasting this pattern into your own document, altering this pattern in any way and calling it your own, etc.), or distribution of this pattern or content (i.e. sharing this pattern in its whole form on your own blog) is allowed. You can use this blog post in blog round-ups. I give permission to sell your items made from this pattern. Please credit “While They Dream” in your listings. The pattern and all photos are the property of While They Dream. You are welcome to share my patterns across all social media forms as long as you link back to my blog directly.
Inspiration
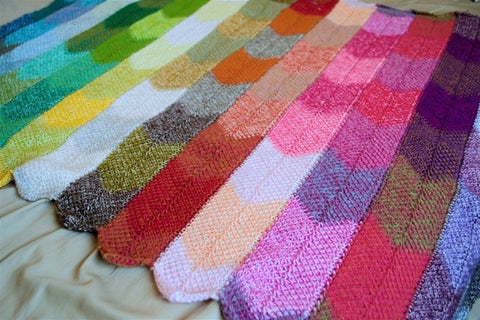
When I got my mini pack of Scheepjes yarn I wasn’t totally sure what I was going to do with it. Initially my intent was to knit with it, but I was really itching to make something Tunisian for quite sometime. It had been a solid year since I picked up my Tunisian hook and I was dying to create something. I had seen a few Tunisian projects that were created in panel form and I knew that was what I wanted to do here. This would ensure that you could create your blanket as small or large as you wanted – no rules! I sat down with my Tunisian hook and started playing with some Tunisian chevron and from there the tunisian crochet Lake Pepin Blanket was created.
Lake Pepin is in Minnesota. It’s one of my happy places. It’s where I spent my first Mother’s Day, soaking up some much needed sunshine, after my first miscarriage in 2018. It’s full of sail boats and amazing bluff views and it just warms your soul.
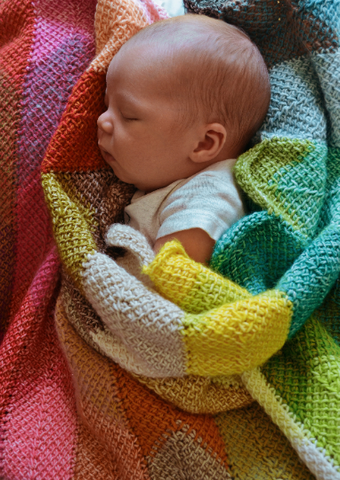
When I was creating this blanket I kept joking that I was manifesting my Rainbow Baby (because the only size that my pack of yarn could make on it’s own was baby blanket sized and I REALLY wanted another baby). Well, it turned out that it worked and I did find out I was pregnant shortly after releasing this pattern. However, sadly, that baby also did not make it (May 2019) and my second Mother’s Day in a row was faced with yet another loss. In June 2020 I finally got my Rainbow Baby, so this blanket holds a special place in my heart.
Sizes
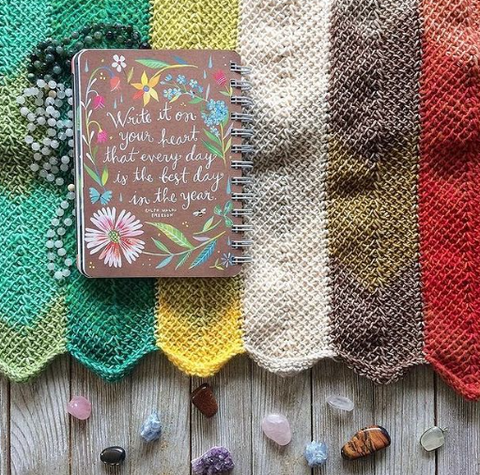
The blanket I made is baby blanket sized. When I started this I was just sort of winging the size and wasn’t quite sure where the whole color pack would take me for width. If I did this again with this same color pack, I would do my height a bit differently. Since my “arrows” are the “design” I would go taller rather than wider with this. I would go to more of a receiving blanket size and take my height to 40″ instead of 34″ as I believe I would likely end up with more of a 40″ x 40″ blanket in the end. BUT, the point of this whole design is to make it as long or as short as you would like with any yarn you would like to use.
Supplies Needed
- Crochet Hook: 5.5mm/I Tunisian Crochet Hook
- Yarn: Any yarn that you’d like to use, I would just stick with the same weight throughout of course. In mine I used the Scheepjes Stone Wash/River Wash Yarn Pack which is a Sport Weight yarn. One pack will make a baby blanket size. This is a great project for using up leftover scrap or stash yarn.
Stitch Abbreviations
Ch – chain
TSS – Tunisian Simple Stitch: insert hook from right to left behind the single vertical bar. Yarn over. Pull up a loop. Repeat this step until you have the indicated amount of loops on your hook. On your backward pass, yarn over, pull through one loop. Yarn over, draw through two loops. Continue to draw through two loops at a time until the end of your row. When you end you will have one loop left on your hook. You never turn your work in TSS.
Tss3tog – Tunisian Simple Stitch 3 together.
YO – Yarn Over
Important Notes
- Again, this pattern is really a free for all. Make your panels as long as you would like them to be. Each little skein is of the Scheepjes minis is 10g and I use half of a skein at a time. For example, I did around 13-14 rows in Black Onyx. During my backward pass on row 13 or 14 I changed colors over to Blue Apatite. Again, I did around 13-14 rows with the Blue Apatite and then I changed colors on my Row 13 or 14 backward pass back to Black Onyx and finished up that mini skein. Sometimes a mini would give me more than 13 rows in my second round and that was fine by me. I tried to have very little waste and it made for a bit of a height variation between some of my arrows, which I also enjoyed. If I ended a panel with only 5 rows, for example, in the color I was working, I would start my next column with that same color and make 8 rows (to make 13 total rows) before switching to a new color for the new panel.
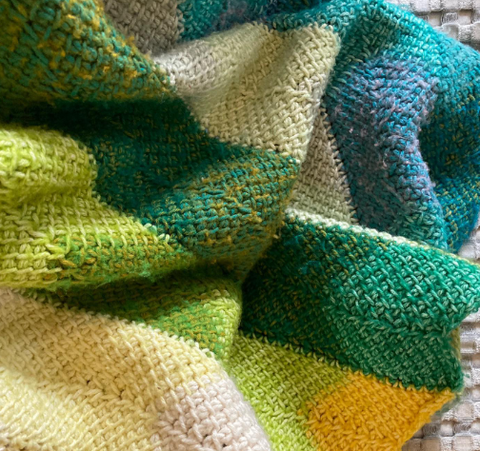
- You can change colors on your forward or backward pass. I choose to change on my backward pass because I wanted a blended effect to my color changes. The sky is the limit here…make your color sections as long as you’d like to.
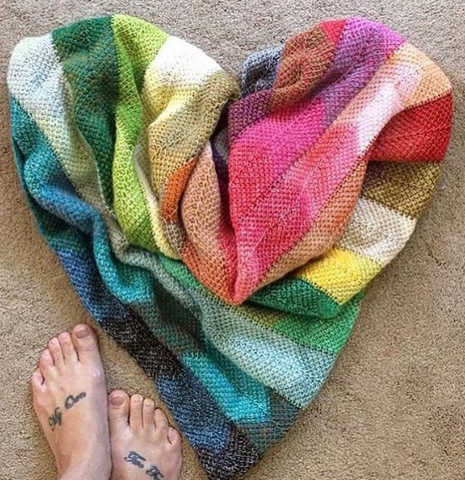
- I’ve been asked several times how I ordered my mini skeins of Scheepjes Stone Washed/River Washed Color Pack. The way that I ordered my yarns is merely a suggestion. I wrote a number on each mini so that I can just keep grabbing them in order. I did not want my rainbow of color to begin in the typical manner. So I begin with black, work into blues and greens, move into yellows and neutrals, move into orange, red, pink, purple, and I will end with a few more blues. See below for the ordered list of colors.
Color List
- Black Onyx
- Blue Apatite
- Tiber
- Rhine
- Severn
- Turquoise
- Wheaton
- Green Agate
- Larimar
- Amazonite
- Crystal Quartz
- New Jade
- Canada Jade
- Fosterite
- Amazon
- Po
- Malachite
- Congo
- Narmada
- Peridot
- Beryl
- Lemon Quartz
- Citrine
- Moon Stone
- Axinite
- Pink Quartzite
- Yellow Jasper
- Ural
- Enstatite
- Brown Agate
- Boulder Opal
- Mersey
- Avon
- Nile
- Coral
- Murray
- Morganite
- Rose Quartz
- Rhodochrosite
- Red Jasper
- Tourmaline
- Ganges
- Mekong
- Carnelian
- Mississippi
- Seine
- Eisak
- Steenbras
- Garnet
- Deep Amethyst
- Corundum Ruby
- Lilac Quartz
- Smokey Quartz
- Obsidian
- Lepidolite
- Colorado
- Yarra
- Danube

GET THE LAKE PEPIN PATTERN
Get the Lake Pepin Blanket pattern from my shop and save big when you bundle 3 or more patterns. See the codes below. The PDF has a full photo tutorial and has a straightforward version for those that do not need the photos. It also includes visuals on how to add panels and tutorials on how to use the magic knot if you'd like to use that to change your colors.
- You can find the PDF Pattern HERE
- Add this to your Ravelry Favorites: CLICK HERE
- Get the pattern on Etsy: CLICK HERE
- Get the pattern on Love Crafts: CLICK HERE
- Get the pattern from Annies Craft Store HERE
PATTERN DISCOUNT CODES:
- SAVE10 - Purchase 3+ Patterns and get 10% off
- SAVE15 - Purchase 5+ Patterns and get 15% off
- SAVE20 - Purchase 8+ Patterns and get 20% off
Pattern
Row 1 Forward Pass: Ch 17. Pull up a loop through the back bar from the 2nd ch from the hook and continue until the end. (17 loops on hook).
Row 1 Return Pass: YO, pull through one loop (this is your ch 1). *YO pull through 2 loops* repeat to end.
Row 2 Forward Pass: Skip your first bar. YO, Tss in the next st. (You will now have 3 loops on your hook). Tss in the next 5 sts. (You will now have 8 loops on your hook). Tss3tog. (You will now have 9 loops on your hook). Tss in the next 6 sts. (You will now have 15 loops on your hook). YO and make one final stitch in the last stitch. This stitch can be located right on the side of your row. It will look like a “V” and you will need to work this stitch so that the “V” is sitting on top of your hook. (17 sts)
Row 2 Return Pass: YO, pull through one. *YO, pull through 2* repeat to the end.
Row 3 Forward Pass: Skip your first bar. YO, Tss in the next 6 sts. Tss3tog. Tss in the next 6 sts. YO, Tss in the last st. (17 sts)
You will work your first Tss into the bar that the YO created. This can be tricky to see until you get the hang of this, so look closely. If your stitch count is off at any point you may have missed a YO.
Row 3 Return Pass: YO, pull through one. *YO, pull through 2* repeat to the end.
You will repeat row 3 for as long as you would like this panel to be. When you have reached the end of your desired length you will slip stitch into each bar on your Forward Pass. Do not make yarn overs across this row, but do slip stitch 3 together in the middle bars like you have been doing. You’ll end with 15 slip stitches across the top (since you are no longer making a yarn over).
Your project will have a curl to the bottom where you begin each panel. You’ll need to block your blanket to straighten these out.
Now, if you’re going to be switching colors (like I know you probably are) let me introduce you to the wonderful world of Magic Knots. I am using this throughout my blanket and I could not be happier with the minimal ends I’ll be needing to weave in.
Moving on, I’ll now explain how to add panels.
To begin, make a slip knot on your hook and then remove your hook from the loop. Insert your hook through the first edge stitch and reattach your slip knot to the hook.
Now you will attach this loop to the first stitch at the bottom of our panel by yarning over and pulling through the loop. That’s it! You’re now attached.
Row 1 Forward Pass: Ch 17. Pull up a loop through the back bar from the 2nd ch from the hook and continue until the end. (17 loops on hook). When you reach the end and you have 17 loops on your hook you will now insert your hook in to the edge stitch. Yarn over and pull up a loop.
Row 1 Return Pass: *YO pull through 2 loops* repeat to end. Note: since attaching at the end of the row creates an extra stitch, we no longer yarn over and pull through one to begin. You’ll always pull through 2 so that we can get the stitch count back to 17 sts.
Row 2 Forward Pass: Skip your first bar. YO, Tss in the next 6 sts. Tss3tog. Tss in the next 7 sts. Insert hook into the top of your last stitch (the space in which you would do a normal crochet stitch), pull up a loop. Insert hook into the next panel edge stitch above and pull up a loop. (18 sts).
Row 2 Return Pass: *YO pull through 2 loops* repeat to end.
Continue to repeat Row 2 for the length of your panel. When you have reached the end of your desired length you will slip stitch into each bar. Do not make yarn overs across this row, but do slip stitch 3 together in the middle bars like you have been doing. You’ll end with 15 slip stitches across the top (since you are no longer making a yarn over), plus one final slip stitch to attach your top edge from this panel to the top edge of your last panel.
That’s it! I hope you really enjoy making this as much as I do!!
I would love to see your Lake Pepin blankets, so please, please tag me! Use the hashtag #lakepepinblanket and be sure to follow me on Instagram!